GoDaddy Change Nameservers
Keep your website and email up and running by having correct nameservers on your domain. You can change the nameservers for your domains registered with GoDaddy in your GoDaddy account. There are always at least two nameservers for a domain, and when nameservers are changed, the place where you manage DNS also changes.
Example: If a domain is using default GoDaddy nameservers, the DNS zone file will be in your GoDaddy account. If the domain is using nameservers for a different company, the DNS zone file will be in that company account instead.
- Sign in to your GoDaddy Domain Portfolio. (Need help logging in? Find your username or password.)
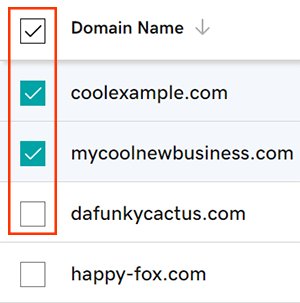
- Select the checkboxes next to the domains you’ll be updating. Or, select the checkbox next to Domain Name and then choose Select All.
- Select Nameservers from the action menu.
- Depending on your screen size, you may need to select the More menu and scroll down to see Nameservers.
- Choose the nameserver setting that works best for you:
- GoDaddy Nameservers (recommended): We’ll update your domain to a set of GoDaddy nameservers, and you’ll manage DNS in your GoDaddy account.
- I’ll use my own nameservers: Enter your custom nameservers. Your DNS will be managed elsewhere and not through your GoDaddy account.
- Select Save, then Continue to complete your updates.
- If your domain has Domain Protection, you’ll need to verify your identity. If you’ve had two-step verification (2SV) turned on for at least 24 hours, enter the code we sent via SMS, or enter the code from your authenticator app. Otherwise, enter the one-time password we sent to your registrant email address.
You’ll see a Success confirmation letting you know the nameservers have been updated. Most DNS updates take effect within an hour, but could take up to 48 hours to update globally.
Bluehost Change Nameservers
Creating custom name servers can be easily done in the Domain Manager. However, before you begin, there are some things to consider:
- Are you going to use us to host the website?
- Would A Records and/or Cnames be more suitable?
Note: When you update Nameservers, you are determining who will control your domain’s DNS management.
Accessing Name Server Settings
Note: Bluehost provides two interface choices for account management: the original ‘Bluerock’ control panel and the newer ‘Account Manager’ designed for easier use. Although both offer similar management features, the settings and locations might differ. Refer to ‘Account Manager vs. Bluerock’ to understand which guidelines to follow.
Account Manager
- Log in to your Bluehost control panel.
- Click the Domain Name tab from the side navigation menu to the left.
- Make sure that the correct domain is selected.
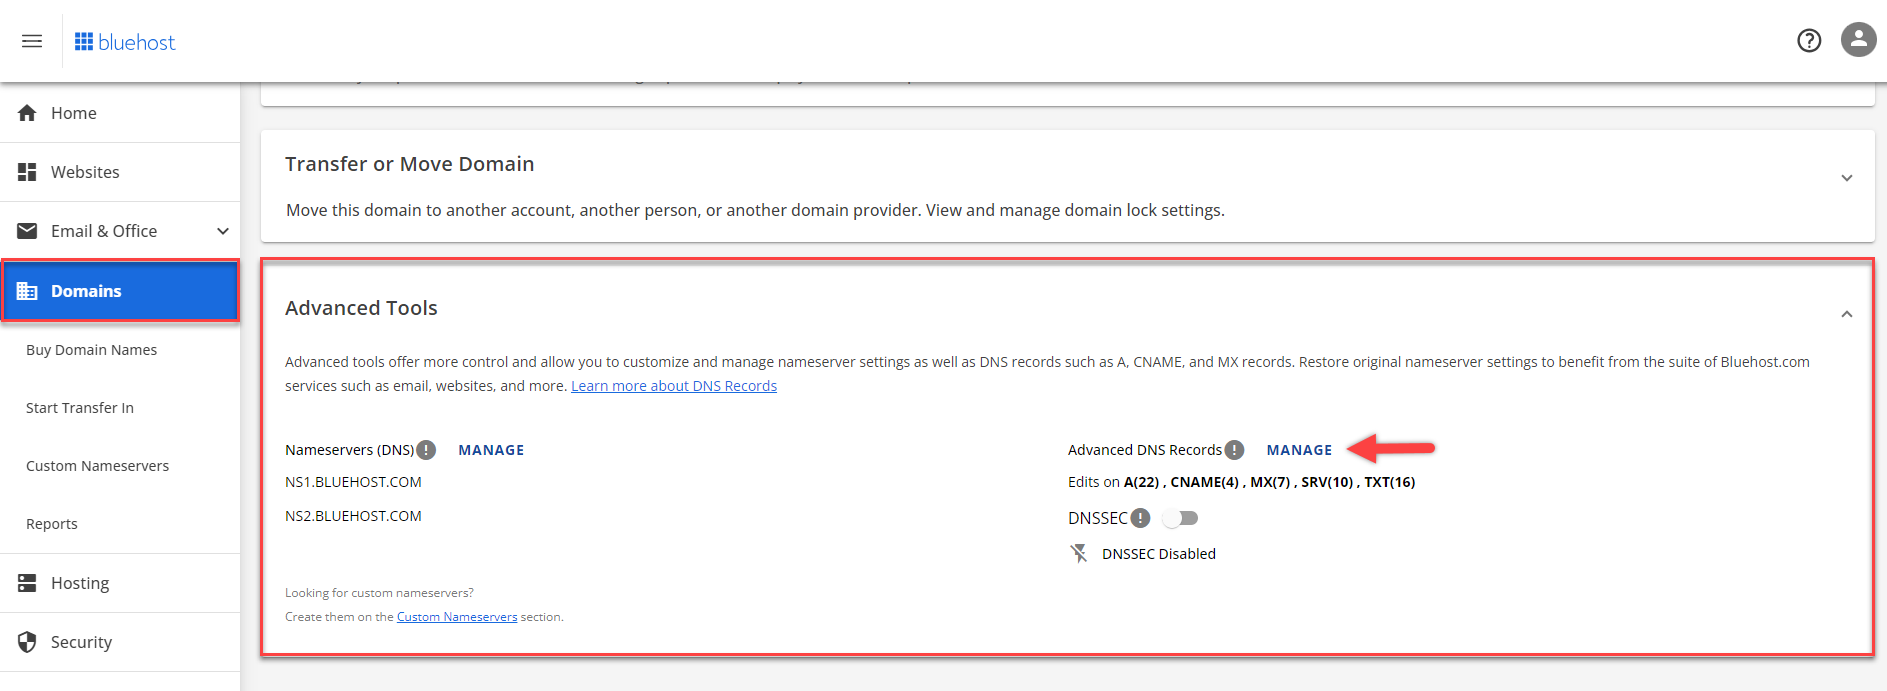
- Click the Advanced Tools section.
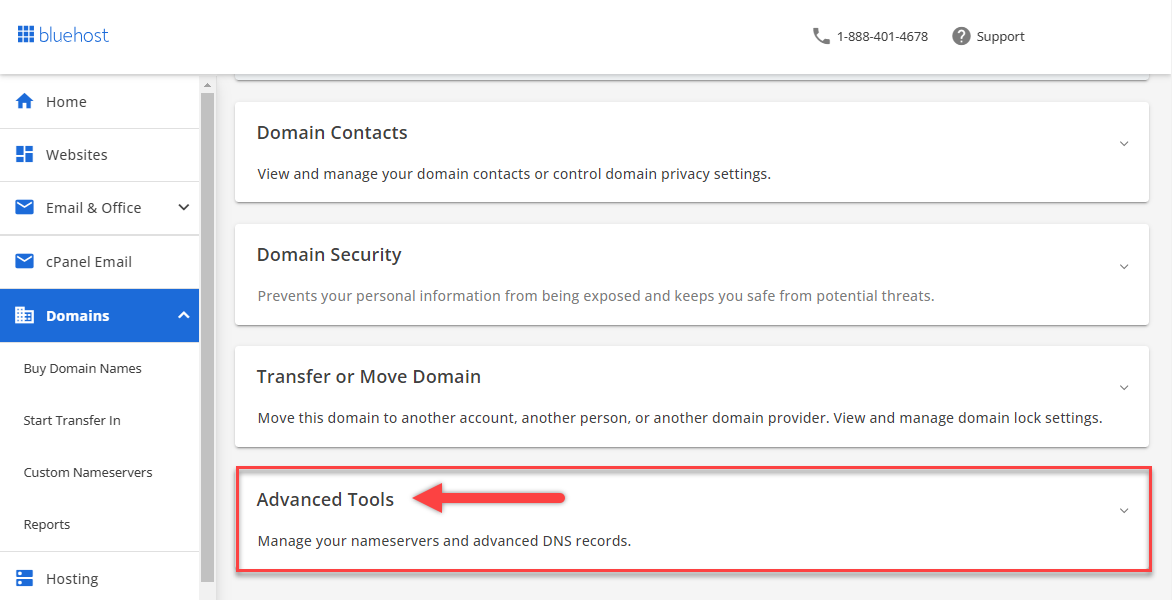
- Click MANAGE next to Nameservers (DNS).
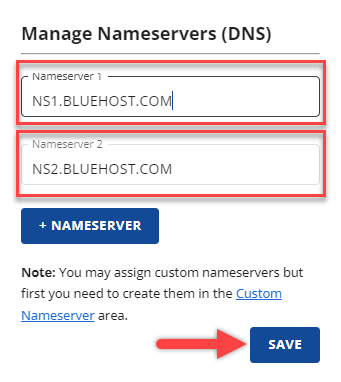
- Manage Nameservers (DNS) pop up will show up. To proceed, Click Continue.

- Enter new settings.
Bluehost Nameserversns1.Bluehost.comns2.Bluehost.com - To save changes, click Save.
Bluerock
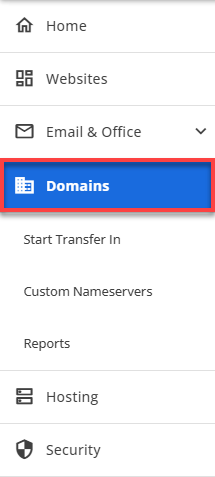
- Click the Domains tab from the side navigation menu to the left.
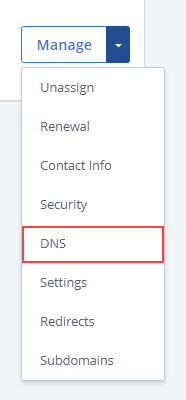
- Next to the domain name you wish to update, click the ▼ icon next to Manage, then choose DNS from the drop-down menu that appears.
- Select the DNS tab.
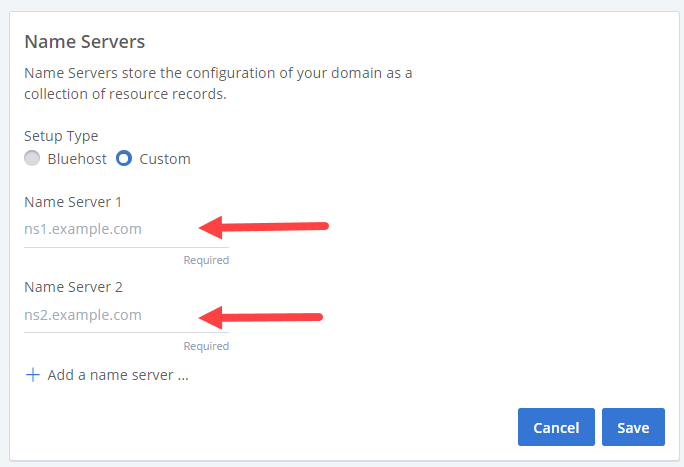
- In the Name Servers section, click the Edit button.
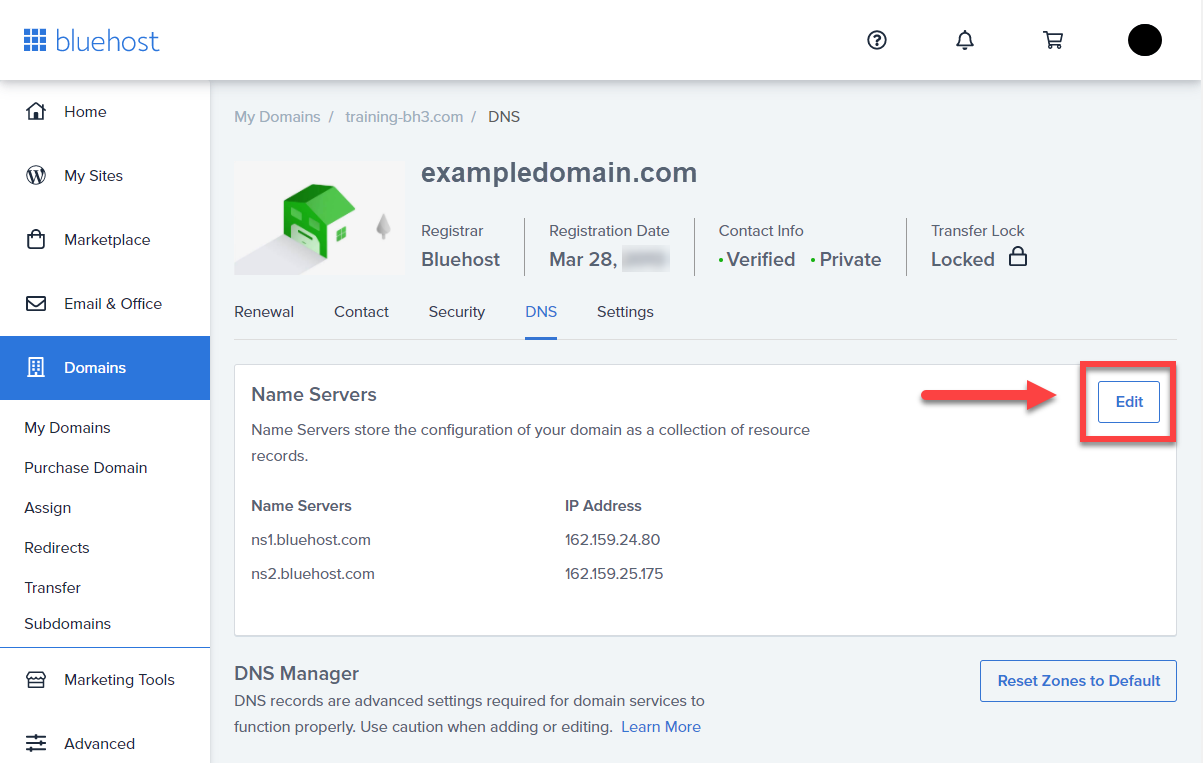
- For Setup Type, select the Custom Nameservers toggle, and enter the nameservers for your account.
Bluehost Nameserversns1.Bluehost.comns2.Bluehost.com - Click the Save button to save changes when finished.